How to Change the Weather in Photos Using Hypic AI (2026 Guide)
Introduction
Have you ever taken a great photo only to be disappointed by dull gray skies or bad weather? Instead of waiting for the perfect day or using complicated editing software, you can now transform the atmosphere of your photos in just a few taps with Hypic AI.
If you want to explore every AI feature introduced in the latest update, don’t miss our complete guide to What’s New in Hypic v9.1.0, where we explain all the new editing tools in detail.
The latest versions of Hypic introduce Atmosphere Swapping, an AI-powered feature that can replace or enhance weather conditions while keeping your subject looking natural. Whether you want to create a bright sunny afternoon, a dramatic stormy scene, or a warm golden sunset, Hypic makes the process fast and beginner-friendly.
In this guide, you’ll learn how to change the weather in photos using Hypic AI, when to use Atmosphere Swapping, and practical tips for achieving realistic results.
Quick Answer
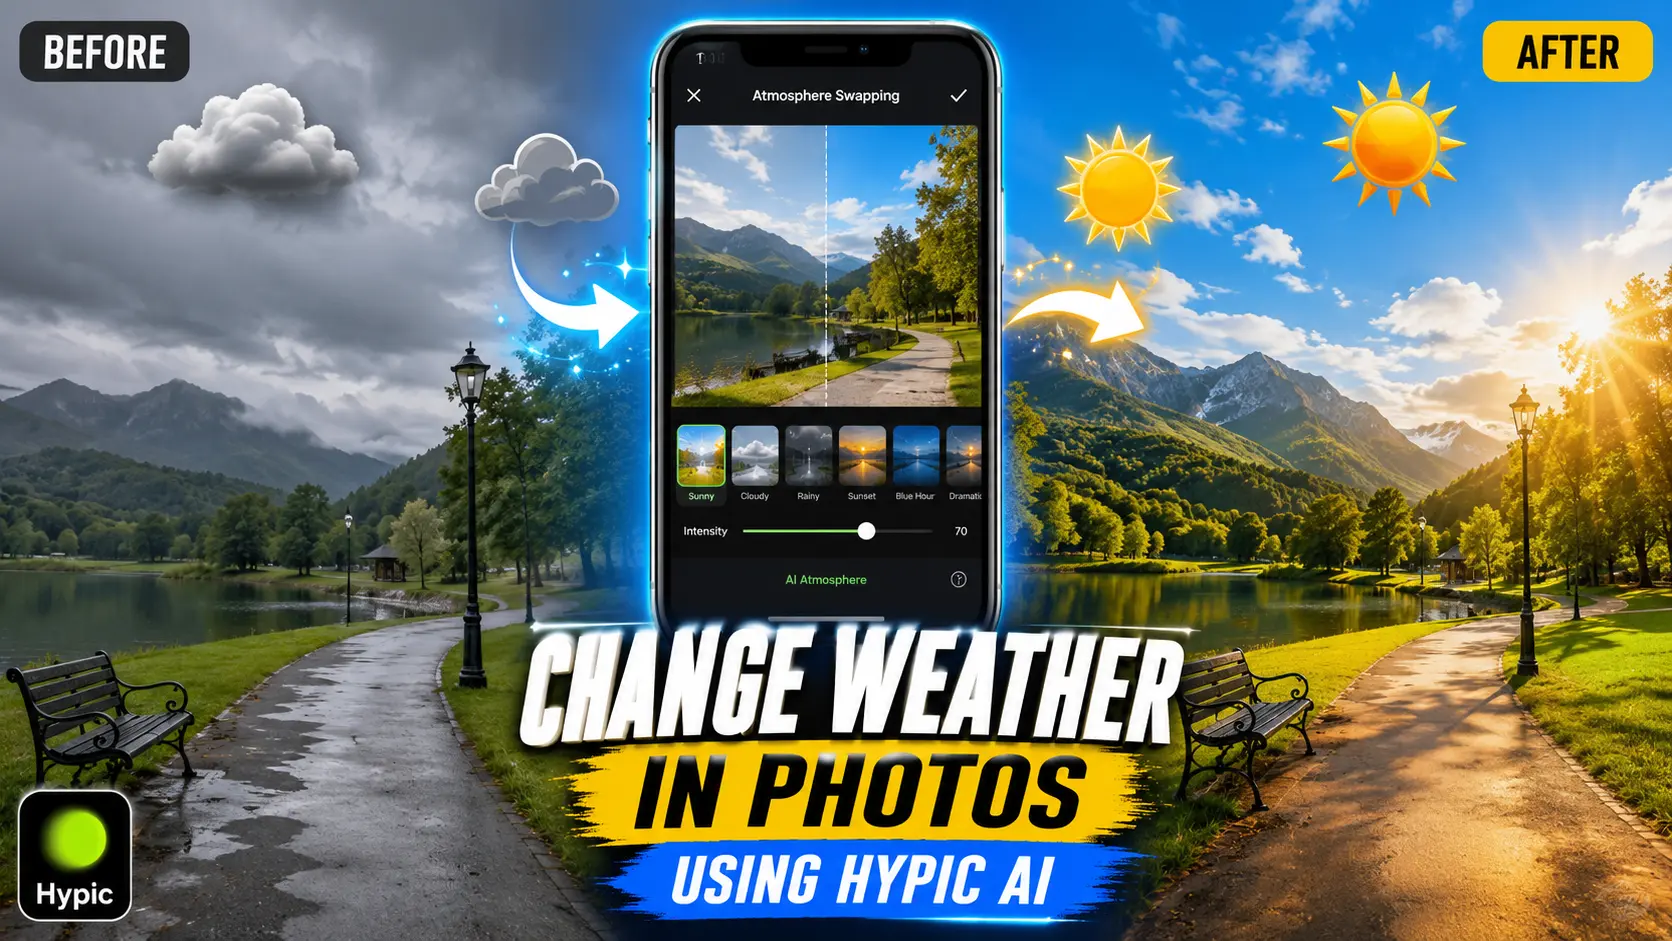
Atmosphere Swapping in Hypic uses AI to analyze your photo and replace or enhance weather conditions automatically. Open your image, select the Atmosphere Swapping tool, choose a weather style such as sunny, cloudy, rainy, or sunset, preview the result, and save the edited image.
What Is Atmosphere Swapping in Hypic?
Atmosphere Swapping is one of the standout AI features introduced in the latest version of Hypic. Instead of manually adjusting skies, lighting, and colors, the AI intelligently detects the scene and applies a new weather environment that blends naturally with the subject.
Unlike traditional weather editing apps that simply overlay filters, Hypic adjusts lighting, shadows, sky colors, and environmental tones together to create a more realistic effect.
This makes the feature useful for both casual users and content creators who want professional-looking edits without advanced editing skills.
Atmosphere Swapping is one of several powerful AI photo editing tools available in Hypic that help users create professional-looking edits with minimal effort.
Why Use AI to Change Weather in Photos?
Weather has a huge impact on the overall mood of a picture. Even a perfectly framed photo can appear flat if the lighting or sky doesn’t match the feeling you want to create.
Using Atmosphere Swapping allows you to:
- Transform cloudy skies into bright sunny scenes.
- Add dramatic storm effects for creative photography.
- Create warm golden-hour lighting without waiting until sunset.
- Improve travel photos taken in poor weather.
- Build a consistent visual style across your social media feed.
- Save time compared to manual photo editing.
For social media creators, travel bloggers, and mobile photographers, this feature offers a simple way to improve outdoor images in just a few seconds.
When Should You Use Atmosphere Swapping?
This AI feature works best in situations where the original weather reduces the visual quality of the photo.
Some common examples include:
- Outdoor portraits under cloudy skies
- Landscape photography
- Vacation pictures
- City photography
- Beach photos
- Nature photography
- Real estate exterior images
- Travel content for Instagram or TikTok
When used correctly, Atmosphere Swapping can dramatically improve the mood of these images while keeping them realistic.
How to Change the Weather in Photos Using Hypic AI
Changing the weather in a photo with Hypic is a straightforward process. Follow these steps to create realistic weather effects in just a few minutes.
Step 1: Update Hypic to the Latest Version
Before you begin, make sure you’re using the latest version of Hypic. Atmosphere Swapping is a newer AI feature and may not be available in older releases.
Open the app and install any available updates before editing your photos.
If you’re using an older release, you can download older versions of Hypic, but some AI weather editing features may not be available.
Step 2: Import Your Photo
Launch Hypic and tap the Edit button.
Choose a photo from your gallery that contains an outdoor scene. Images with visible skies, landscapes, buildings, or natural backgrounds usually produce the most impressive results.
Step 3: Open the Atmosphere Swapping Tool
Navigate to the AI editing tools and select Atmosphere Swapping.
Hypic will automatically analyze your image before displaying the available weather styles.
Depending on your app version, you may see effects such as:
- Sunny
- Cloudy
- Rainy
- Blue Hour
- Golden Sunset
- Dramatic Sky
Step 4: Select Your Preferred Weather Effect
Choose the atmosphere that best matches the mood you want to create.
For example:
- Use Sunny to brighten dull outdoor photos.
- Choose Golden Sunset for warm evening lighting.
- Apply Blue Hour to create a calm twilight atmosphere.
- Select Rainy when creating cinematic or dramatic scenes.
The AI automatically adjusts lighting, colors, reflections, and environmental tones to create a natural-looking result.
Step 5: Preview the Changes
Move the intensity slider if available and compare the edited version with the original photo.
Pay close attention to:
- Sky transitions
- Subject lighting
- Shadows
- Overall color balance
If the effect appears too strong, reduce the intensity until the image looks realistic.
Step 6: Save Your Edited Photo
Once you’re satisfied with the final result, export the edited image in your preferred quality.
Your new weather-enhanced photo is now ready to share on Instagram, TikTok, Facebook, or any other platform.
Best Photos for Atmosphere Swapping
Although Hypic AI works with many image types, certain photos produce significantly better results.
The feature performs best with:
- Landscape photography
- Travel photos
- Beach scenes
- Mountain views
- City skylines
- Parks and gardens
- Outdoor portraits
- Street photography
Photos with a clearly visible sky generally provide the most realistic weather transformations.
Travel photos often look even more authentic when edited with the G7X2 Digicam Look, especially after improving the weather.
Pro Tips for Realistic Weather Editing
Changing the weather is easy, but making the final image look believable requires a little extra attention.
Choose Photos with Open Skies
Images that include a large portion of the sky allow the AI to generate more convincing weather effects.
Match the Lighting
If your subject is brightly lit, avoid applying dark storm effects unless the lighting naturally supports that look.
Consistent lighting creates more realistic edits.
Avoid Overusing AI Effects
Strong weather effects can sometimes make an image look artificial.
For the best results, use moderate intensity and preserve the original details whenever possible.
Keep Colors Natural
Highly saturated skies may attract attention, but natural color tones usually look more professional and are better suited for social media.
Combine with Other AI Tools
After changing the weather, you can further improve the image using other Hypic AI features such as AI Flash or AI Skin Glow if needed.
Common Mistakes to Avoid
Many beginners expect AI to completely transform every image.
To achieve better results, avoid these common mistakes.
Using Indoor Photos
Atmosphere Swapping is designed primarily for outdoor photography.
Indoor images usually have little or no visible sky, limiting the effectiveness of the feature.
Choosing the Wrong Weather Style
Not every weather effect suits every photo.
For example, applying a rainy atmosphere to a bright summer beach scene may look unrealistic.
Always select a weather style that matches the original composition.
Ignoring the Preview
Before exporting, compare the edited version with the original.
Small adjustments often produce much better-looking images than extreme edits.
Editing Low-Resolution Images
Poor-quality source images give the AI less visual information to work with.
Whenever possible, start with high-resolution photos.
Atmosphere Swapping vs Traditional Weather Editing
| Feature | Atmosphere Swapping | Manual Weather Editing |
|---|---|---|
| Editing Speed | ⭐⭐⭐⭐⭐ | ⭐⭐ |
| Beginner Friendly | ⭐⭐⭐⭐⭐ | ⭐⭐ |
| Realistic AI Lighting | ✅ | Limited |
| Sky Replacement | ✅ | Manual |
| Consistent Results | ✅ | Depends on Skill |
| Time Required | Few Seconds | 20–40 Minutes |
If you want fast, realistic weather transformations, Atmosphere Swapping is the better choice.
Frequently Asked Questions
Can Hypic change cloudy weather into sunny weather?
Yes. Atmosphere Swapping can brighten cloudy outdoor photos and create a sunny appearance while adjusting lighting and colors automatically.
Can I create rainy weather in Hypic?
Yes. Depending on your version of Hypic, you can apply rainy or dramatic weather effects to outdoor images.
Does Atmosphere Swapping work on indoor photos?
It works best on outdoor photos where the sky and surrounding environment are visible.
Is Atmosphere Swapping free in Hypic?
Some weather editing features may be available for free, while premium AI tools could require a subscription depending on your app version.
Does changing the weather reduce image quality?
No. The AI modifies the weather while maintaining the original image quality, although export settings may affect the final resolution.
Final Verdict
Atmosphere Swapping is one of the most impressive AI-powered features introduced in recent versions of Hypic. Instead of spending time manually replacing skies or adjusting lighting, you can completely transform the mood of an outdoor photo with just a few taps.
Whether you’re editing travel photos, landscapes, portraits, or social media content, this tool helps create more engaging images while keeping the results natural and visually appealing.
If you prefer editing on a larger display, you can also use Hypic for PC to take advantage of a bigger workspace.
If you regularly capture outdoor scenes, Atmosphere Swapping is a feature worth exploring in the latest version of Hypic.