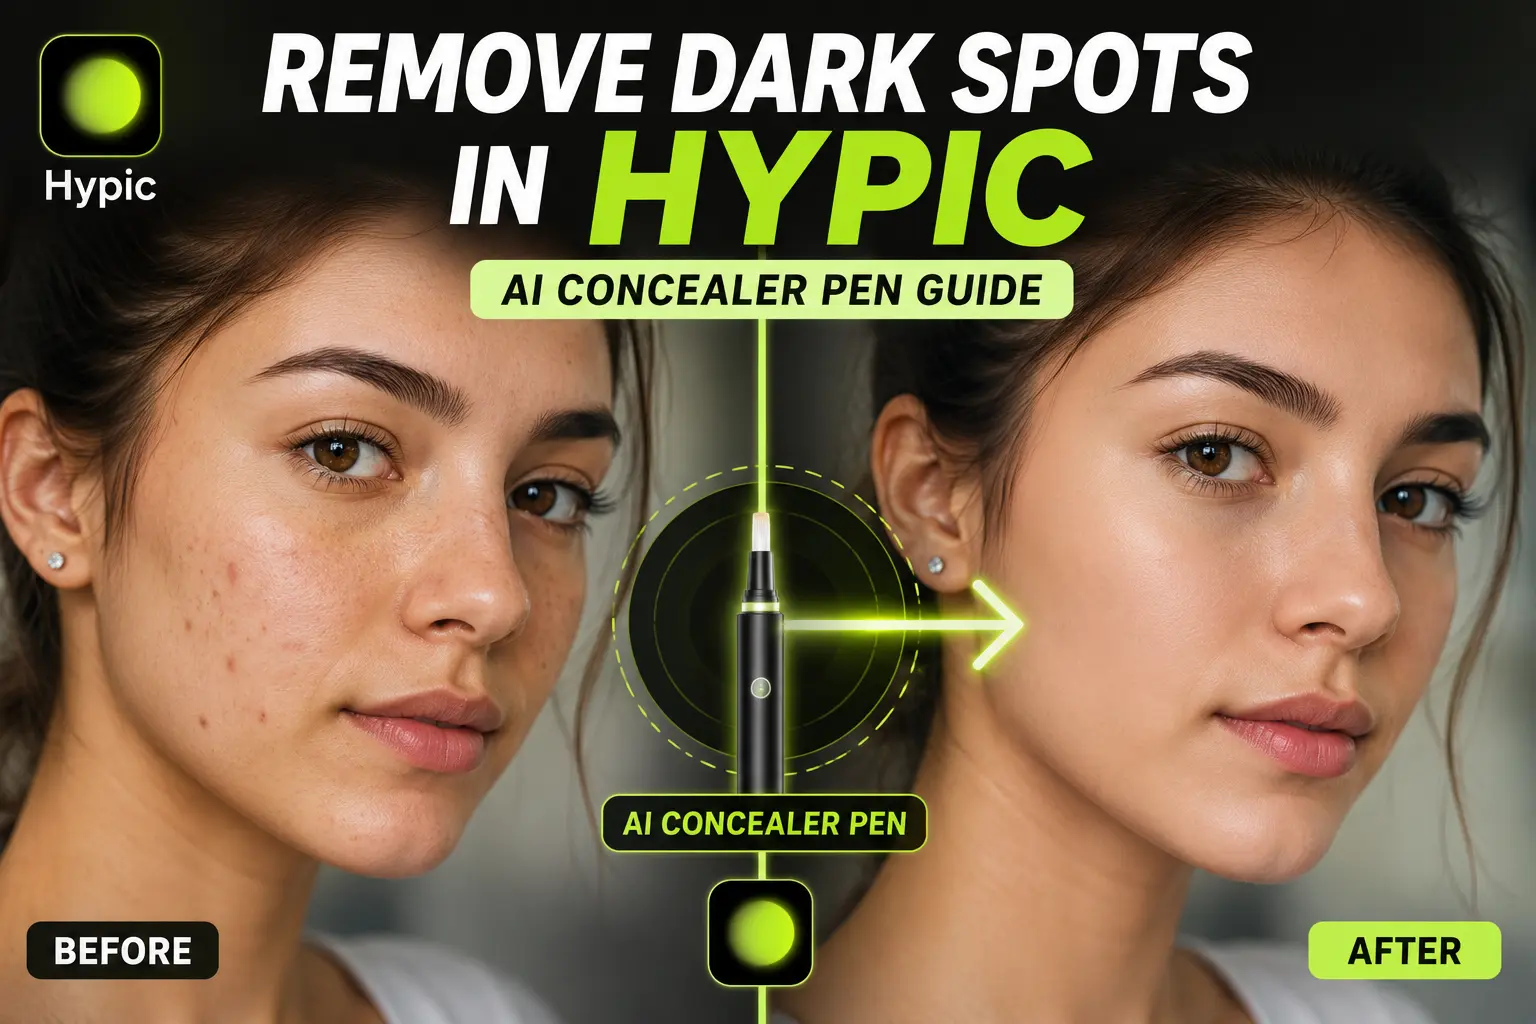
How to Remove Dark Spots in Hypic Using AI Concealer Pen
Dark spots, acne marks, blemishes, and small skin imperfections can sometimes distract from an otherwise great portrait. If you want to clean up these areas without applying a heavy beauty filter to the entire face, Hypic’s AI Concealer Pen can make the process much easier.
The tool lets you work on specific parts of a photo instead of changing the appearance of the whole face. This makes it useful for anyone who wants to remove dark spots in Hypic while keeping the skin looking natural.
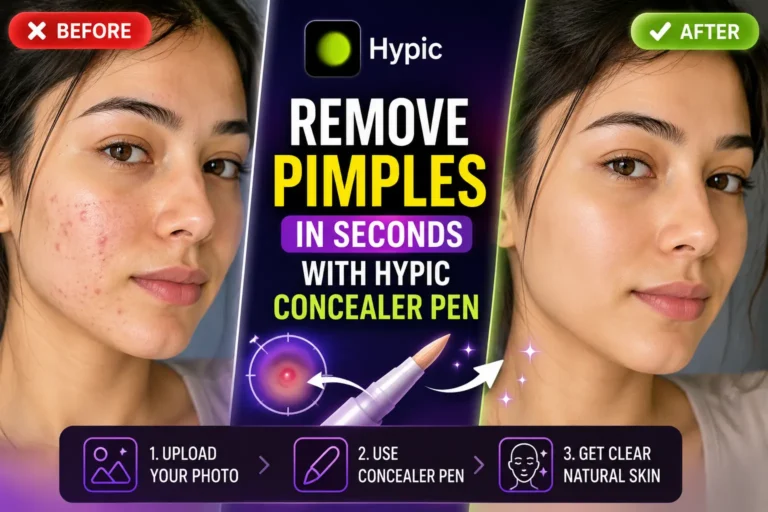
Quick answer: To remove dark spots in Hypic, import your photo, open the AI Concealer Pen, zoom into the affected area, apply the tool over the dark spot, and check the result before saving. Small, controlled edits usually give a more natural finish.
What Is the AI Concealer Pen in Hypic?
The AI Concealer Pen is an AI-powered retouching tool designed to help reduce the appearance of small imperfections in photos. Rather than applying a beauty effect across the entire face, you can target specific areas that need correction.
It can be useful for cleaning up:
- Dark spots
- Acne marks
- Small blemishes
- Minor scars
- Uneven-looking areas
- Small facial imperfections
- Other distracting marks in a portrait
The biggest advantage is control. You can work on one small area while leaving the surrounding skin and facial features untouched.
This can be particularly useful for selfies, portraits, profile pictures, and other photos where you want a cleaner appearance without making the skin look completely artificial.
How to Remove Dark Spots in Hypic
Removing a small dark spot with the AI Concealer Pen is a straightforward process. The exact location of editing tools can vary between Hypic versions, but the general workflow is similar.
1. Open Your Photo in Hypic
Launch Hypic and import the portrait or selfie you want to edit.
If you’re using the app on a computer, you can also check our guide to Hypic for PC for more information about using Hypic on a larger screen.
For iPhone or iPad users, you can also explore the dedicated Hypic for iOS page.
For better results, start with the highest-quality original photo available. A clear image with good lighting gives you more detail to work with.
2. Open the Retouching Tools
Once your photo is loaded, open the available retouching or editing tools and look for the AI Concealer Pen.
Select the tool so you can begin working on individual areas of the photo.
If you’re exploring different versions or app options, you can also browse the available Hypic apps and related resources.
3. Zoom In on the Dark Spot
Before applying the effect, zoom into the part of the face where the dark spot appears.
Zooming in gives you better control and makes it easier to avoid accidentally affecting nearby areas such as the eyes, eyebrows, lips, or natural skin texture.
4. Apply the AI Concealer Pen
Carefully apply the concealer over the dark spot or blemish you want to reduce.
Try using short and controlled strokes rather than covering a large section of the face at once. Small adjustments generally make it easier to maintain a realistic appearance.
5. Check the Edited Area
After applying the tool, zoom out and look at the complete portrait.
A result that looks good when you’re heavily zoomed in can sometimes appear too smooth when viewed at normal size. Checking the full image helps you decide whether another small adjustment is actually necessary.
6. Make Small Corrections if Needed
If the dark spot is still visible, apply another light adjustment rather than heavily editing the same area.
The goal is not necessarily to remove every trace of natural skin detail. Instead, aim for a result that looks cleaner while still resembling real skin.
7. Save Your Photo
Once you’re happy with the result, review the entire image one final time and save the edited photo.
If possible, compare the finished version with the original before exporting. This makes it easier to notice areas that may have been over-retouched.
Tips for Better Dark Spot Removal in Hypic
The AI Concealer Pen can simplify the editing process, but the way you use it can have a big impact on the final result.
Use a Clear Original Photo
Start with the highest-quality original photo available.
Very blurry or heavily compressed images contain less detail, which can make small retouching edits less convincing. A clear portrait with reasonable lighting usually provides a better starting point.
Zoom In Before Editing
Working while zoomed in gives you more control over individual imperfections.
It also reduces the chance of accidentally applying the effect to a larger area than intended.
Use Short, Controlled Strokes
Avoid covering an entire cheek or forehead when you only need to correct one small spot.
Work gradually and focus on the exact area that needs attention. This approach helps preserve natural skin texture.
Check the Photo at Normal Size
Don’t judge the result only while zoomed in.
After editing, zoom back out and view the portrait normally. This gives you a better idea of whether the retouching actually looks natural.
Compare Before and After
Before saving the final image, compare it with the original.
Ask yourself:
- Does the dark spot look less noticeable?
- Does the skin still have natural texture?
- Did the edit affect nearby areas?
- Does the face still look like the original person?
If the answer is yes, the retouching is probably at a good level.
Don’t Overdo the Retouching
One of the easiest mistakes in portrait editing is removing too much detail.
Natural skin contains texture, small variations, and imperfections. Removing all of these can make a face look unusually smooth or blurry.
For most portraits, a subtle correction is better than an aggressive edit.
How to Get More Natural-Looking Results
If you want your dark spot removal to look less noticeable, think of the AI Concealer Pen as a correction tool rather than a complete skin replacement tool.
Instead of trying to make the skin perfectly smooth, focus on reducing the visual distraction caused by the specific spot.
For example, if a small blemish is visible on the cheek, you generally don’t need to edit the entire cheek. Targeting only the blemish can preserve the surrounding texture and make the final result look more realistic.
You can also explore other Hypic prompts if you’re interested in experimenting with AI-assisted photo editing and creative effects.
Another useful habit is to take breaks between adjustments. After making several edits, look at the complete photo instead of continuing to retouch automatically. Sometimes an area that seems imperfect when zoomed in looks completely fine at normal viewing size.
Common Problems When Using the AI Concealer Pen
The Skin Looks Too Smooth
If the face starts looking blurry or overly polished, you may have applied too much retouching.
Try using smaller strokes, reducing the amount of correction, or undoing part of the edit to bring back more natural texture.
The Dark Spot Is Still Visible
Some spots may require more than one adjustment, particularly if they are larger or have strong contrast with the surrounding skin.
Instead of using one large stroke, try making several smaller corrections and checking the result after each one.
Nearby Skin Looks Different
This can happen when the edited area is too large.
Zoom in and target the specific imperfection more carefully. Keeping the editing area small can help preserve the appearance of the surrounding skin.
The Result Looks Artificial
An unnatural result is often a sign of over-editing.
Compare the edited photo with the original and look for differences in skin texture, facial detail, and lighting. If the edited area stands out, reduce the correction.
AI Concealer Pen vs Traditional Retouching
Traditional photo retouching can involve manually selecting, cloning, blending, or correcting individual areas. These methods can provide detailed control, but they may require more time and editing experience.
The AI Concealer Pen offers a simpler approach for everyday portrait editing. Instead of manually working through several steps, you can focus directly on the imperfection you want to reduce.
This makes it especially convenient for quick selfies and social media photos where you want a small correction without spending a long time editing the entire image.
Traditional retouching may still be more suitable when you need highly precise control over a complicated area. For simple dark spots and minor blemishes, however, an AI-assisted tool can provide a much quicker workflow.
If you’re comparing Hypic with other photo editing apps, our Hypic comparisons section can help you explore how different editing tools and features compare.
Can Hypic Remove All Dark Spots?
Hypic can help reduce the appearance of many small dark spots, acne marks, and other visible imperfections, but the result will depend on the image.
Several factors can affect the final outcome, including:
- Original photo quality
- Lighting conditions
- Skin texture
- Size of the dark spot
- Contrast between the spot and surrounding skin
- Details around the affected area
Small imperfections are generally easier to correct than large or complex marks.
If a dark spot covers a larger area or contains complicated details, you may need to combine the AI Concealer Pen with other editing tools to achieve a cleaner result.
It’s also worth remembering that photo retouching is about improving the image, not necessarily removing every natural feature from the skin.
Can You Use Hypic to Remove Acne Marks?
Yes, the AI Concealer Pen can be useful for reducing the appearance of small acne marks and blemishes in a portrait.
The same basic workflow applies: zoom into the affected area, make a controlled correction, and then check the complete photo.
For multiple marks, it can be better to work on them individually instead of applying one large edit across the entire face. This gives you more control over how much each area is changed.
My Tip for Natural Results
When using the AI Concealer Pen, always check your photo at two different levels: zoomed in and at normal viewing size.
A correction can look perfect when you’re closely examining one small section but appear noticeably over-edited when you view the complete portrait.
I also recommend making the smallest correction that achieves the result you want. If someone can look at the finished photo without immediately noticing that an area was edited, you’ve probably found a good balance.
Frequently Asked Questions
Where Is the AI Concealer Pen in Hypic?
Open your photo in Hypic and check the available retouching or editing tools for the AI Concealer Pen. The exact interface and tool placement may vary depending on the version of the app.
Can Hypic Remove Large Dark Spots?
The AI Concealer Pen can help reduce visible imperfections, but larger or more complicated dark spots may require multiple adjustments or additional editing tools. Results depend heavily on the original image.
Can I Remove Pimples With the Hypic Concealer Pen?
Yes, the tool can be useful for reducing the appearance of small pimples and blemishes. For the most natural result, target each area carefully instead of applying heavy retouching across the entire face.
Why Does My Skin Look Blurry After Using the Concealer Pen?
Skin can look blurry when an area has been over-retouched. Try using smaller strokes, reducing the amount of correction, or undoing part of the edit to bring back more natural texture.
How Can I Make Dark Spot Removal Look Natural?
Use small, controlled edits and avoid changing large areas of skin unnecessarily. Always check the final portrait at normal viewing size before saving it.
Does the Original Photo Quality Affect the Result?
Yes. Clearer images generally provide more detail for editing. Very blurry, dark, or heavily compressed photos can make precise retouching more difficult.
Can I Use an Older Hypic Version for This Feature?
Feature availability can vary between Hypic versions, so an older release may not contain the same tools or interface as a newer version. If you’re looking for previous releases, you can check the Hypic old versions section.
Final Thoughts
If you’re looking for a quick way to remove dark spots in Hypic, the AI Concealer Pen is a convenient option for cleaning up small imperfections in portraits and selfies.
The best results usually come from subtle editing rather than aggressive retouching. Start with a clear photo, zoom into the affected area, make small adjustments, and check the finished image at normal viewing size.
You don’t need to remove every natural detail from the skin to improve a portrait. In many cases, reducing the visibility of a distracting dark spot while keeping the surrounding texture intact creates a much more realistic result.
For more Hypic tutorials, editing guides, and feature-related content, you can also explore the latest articles in the Hypic blog.