
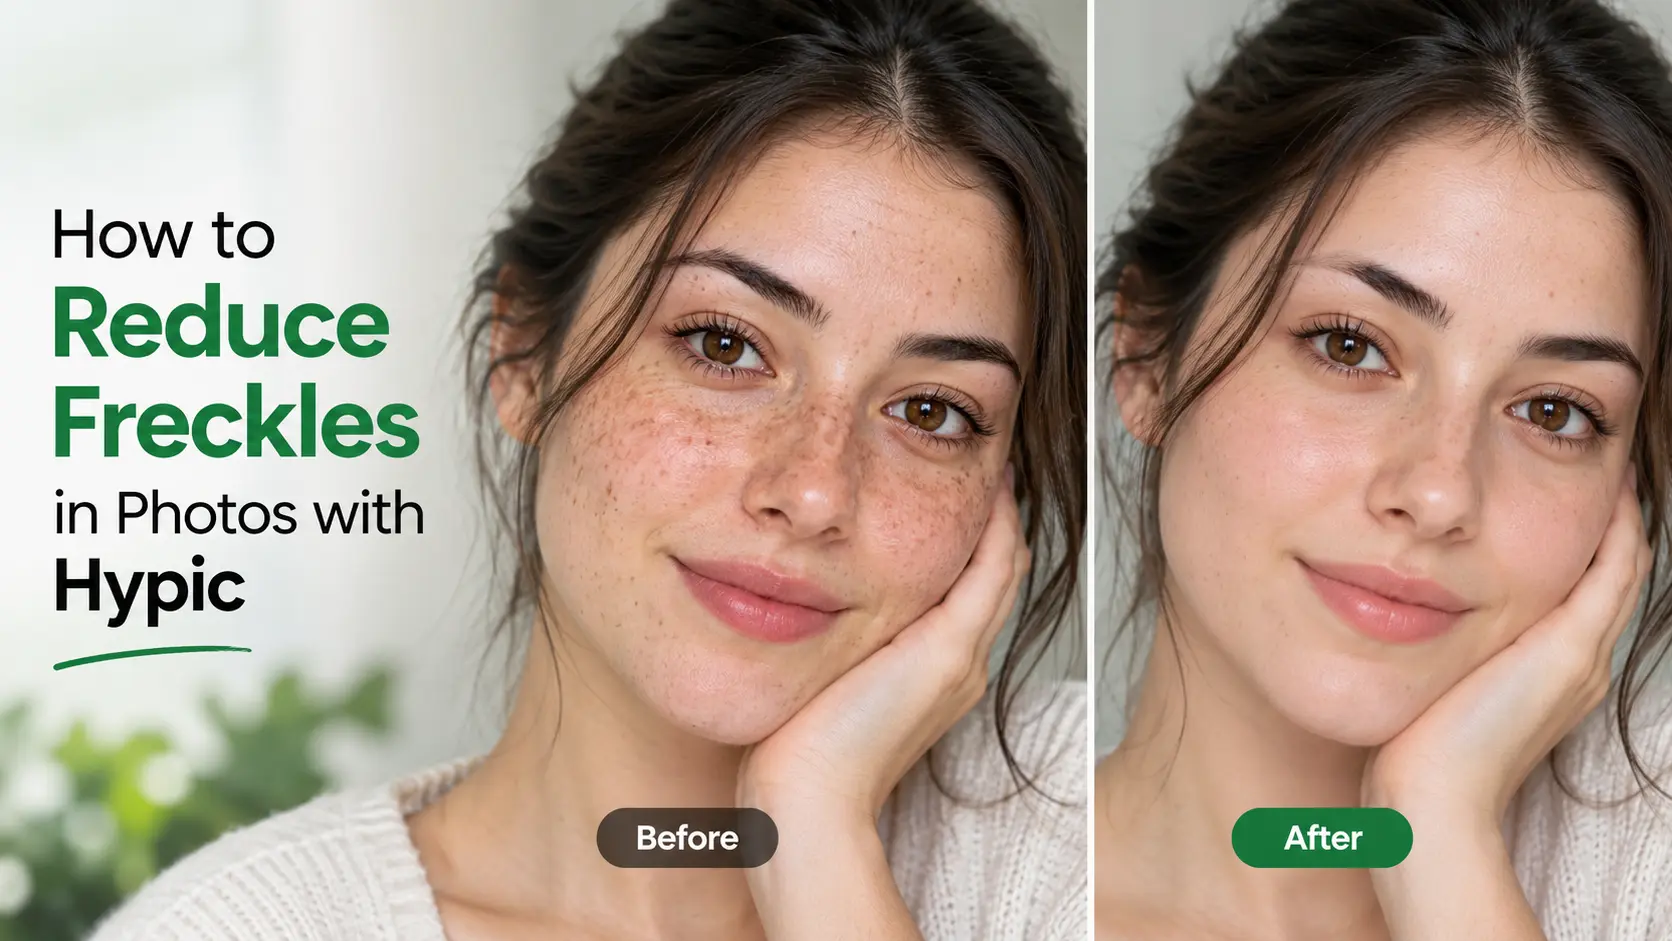
How to Reduce Freckles in Photos with Hypic
Want to make freckles look less noticeable in your photos without making your skin look overly smooth or artificial? Hypic can help you create a more polished portrait by reducing the appearance of visible freckles while keeping your skin texture and facial details intact.
The key is to make small adjustments rather than trying to remove every freckle. A subtle edit can make freckles less prominent while keeping the photo looking natural and recognizable.
Can Hypic Reduce Freckles?
Yes, Hypic can be used to reduce the appearance of freckles in photos with the retouching and skin-editing options available in the app.
Keep in mind that this only changes how freckles appear in the photo. It does not actually remove freckles from your skin.
For a natural-looking result, avoid applying heavy smoothing across the entire face. Instead, focus your edits on areas where freckles are most noticeable and use a lighter adjustment whenever possible.
How to Reduce Freckles in Photos with Hypic
You can use the following approach when editing a portrait in Hypic.
1. Open Your Photo in Hypic
Launch Hypic and select the portrait you want to edit.
A clear, well-lit photo is usually easier to work with because you can make smaller adjustments without relying on heavy retouching.
2. Open the Retouching Options
Open the retouching or skin-editing options available in your version of Hypic.
The exact tools, controls, and interface can vary between app versions, so look for options related to skin retouching or facial enhancement.
Use these tools to work on the areas where freckles are most noticeable.
3. Reduce Freckles Gradually
Instead of trying to erase every freckle at once, start with a light adjustment and increase it only where necessary.
Try to:
- Start with low or moderate retouching strength.
- Focus on the most noticeable freckles.
- Keep some natural skin texture visible.
- Zoom out regularly to check the complete face.
- Avoid strong smoothing around the eyes, nose, and lips.
The goal is to soften the appearance of freckles, not create completely texture-free skin.
Editing tip: Check the photo at its normal viewing size as well as while zoomed in. A close-up can help you spot editing problems, while the normal view shows whether the overall result still looks natural.
4. Keep Your Natural Skin Texture
Natural skin texture is an important part of a realistic photo edit.
Heavy retouching can make skin appear blurry, plastic, or unnaturally smooth. If the editing option you’re using provides an intensity control, start with a lighter setting and increase it only when necessary.
You don’t need to make every freckle disappear. Leaving some natural variation can help the portrait retain the character of the original photo.
If you’re also working on other visible skin imperfections, you can learn how to remove dark spots in Hypic using its AI-powered editing tools.
5. Compare the Edited Photo With the Original
Before saving your photo, compare the edited version with the original.
Check whether:
- The skin still looks natural.
- Facial details remain visible.
- Freckles are less noticeable without disappearing unnaturally.
- Skin texture looks consistent across the face.
- Other facial features have not changed unintentionally.
If the edited version looks noticeably smoother than the original, reduce the retouching intensity and make another pass.
How to Make Freckle Editing Look Natural
A realistic photo edit usually comes from less editing, not more.
Use Subtle Retouching
Strong effects can quickly make skin look artificial. Start with a lighter adjustment and increase it only if the freckles are still too prominent.
Work on Specific Areas
If freckles are mainly visible on the cheeks, you don’t necessarily need to apply the same level of editing to the entire face.
Targeting the areas that need attention can help preserve natural texture elsewhere.
Check the Original Photo
Comparing the edited photo with the original helps you notice when you’ve changed more than intended.
If the face starts looking significantly different, reduce the effect before saving.
Start With a Good Original Photo
A clear, well-lit image generally gives you more control over subtle edits than a dark or heavily compressed photo.
Good lighting can also make skin texture look more natural after editing.
If you want to make other small facial imperfections less noticeable, you can also see how to remove pimples in Hypic with its photo-editing tools.
Before and After: What to Look For
A useful before-and-after example should show the original photo alongside a lightly edited version. This makes it easier to see what a subtle freckle edit looks like in practice.
When comparing the two versions, look for a result where freckles are less prominent while natural skin texture and facial details remain visible.
If the face starts looking unusually smooth, blurry, or different from the original, the retouching is probably too strong.
For the most realistic result, the edited photo should still look like the same person rather than appearing heavily filtered.
Can You Remove Freckles Completely in Hypic?
You can significantly reduce the visibility of freckles in a photo, but completely removing every freckle may produce a less natural result.
For social media portraits, a subtle adjustment can look more convincing than completely flawless skin. Keeping some natural texture helps preserve the appearance and character of the original portrait.
Remember that Hypic is editing the photo, not changing the freckles on your actual skin.
Final Thoughts
Hypic can be useful when you want to soften or reduce the appearance of freckles in a portrait while keeping the edit natural. Start with gentle retouching, focus on the areas that need attention, and compare the result with your original photo before saving.
The goal isn’t perfectly smooth skin. It’s a photo that still looks like you, with freckles that are simply less noticeable.
If you’re experimenting with other skin edits, you can also explore our guide to AI Skin Glow in Hypic for tips on creating a more polished but natural-looking portrait.